Tuesday, June 28, 2011

Tripoli in Detail Tutorial and Diva Challenge 28

The Diva's Challenge this week is to use the newest official tangle Tripoli.

When I first started working with Tripoli I struggled with maintaining consistent size and spacing. Most of the time creating the first circle worked well.  Even the start of the second circle went fairly smoothly.  However without fail when I would get to step 9 (in the illustration below)  things would start to break down. 


First I was trying to draw one large triangle in the remaining spaces of the second circle.  If I kept the spacing between triangles the same I ended up with large out of proportion triangles. If I tried to keep the triangles the same size then the space between was larger, not consistent.  My first attempts at putting 2 triangles in the space did not go well either.

Not sure how or at what point but I had very bright light bulb moment - clarity with no doubt - one of those times where everything clicked into place and changed my whole approach to working the pattern.

The key - I was not seeing triangles I was seeing just the lines.

I decided to post the details of how I draw Tripoli after reading on several blogs that others were having some of the same issues.  Hope you find it helpful.


 click image for larger view or to print

1 - 2 - After drawing the initial triangle, the first leg of the next triangle is drawn parallel to the line of that first triangle. 

3 - In this step the line drawn next, for me, seems to be the easiest way to repeat and maintain a uniform size for the triangles. It also eliminates having to determine the correct angle if the outside edge leg had been drawn second.

4 - 5 Close the triangle and repeat 1 - 4 for the remaining triangles in this first circle.

6 - 8  Again - think lines - start the next triangle as a parallel line to the flat edge of the existing triangle followed by the other 2 legs.  Repeat all the way around the circle.

9  - Solving this step changed my whole perspective - instead of thinking/drawing a triangle the starting point is drawing 2 parallel lines that are an extension of the lines of the triangles in the first circle!

10 - Repeat step 9 to complete the second circle.

One note - Continuing to build out the circles from this point changes the structure slightly so the 2 parallel lines are not always the best option.  In that case just look for the next best option to start with a parallel line and you will be good to go.
 
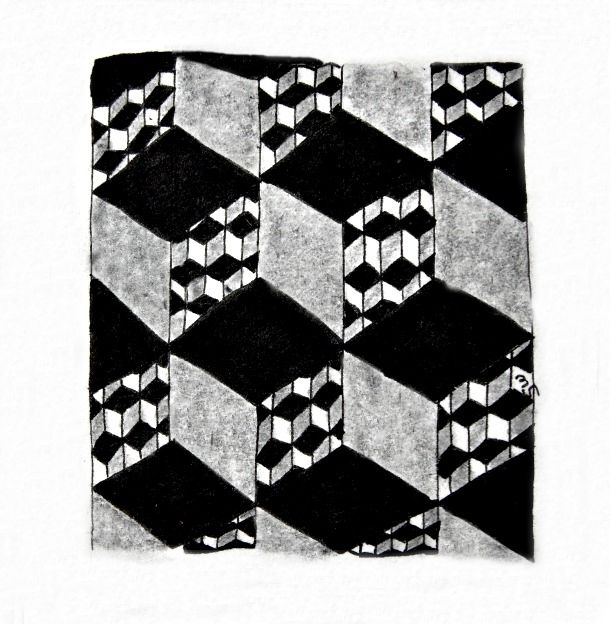
Before filling in Tripoli - liking the simplicity of this - has a filigree look to it.


 After adding patterns - it's ok - really need to watch density - I do get carried away sometimes!

click images for larger view


Friday, June 24, 2011

Diva's Challenge 27


Duo-Tangle
Dex and Verdigogh
 

click image for larger view

Very difficult challenge this week - use only two tangles Dex and Verdigogh.  Straight lines, grids - my kind of tangle.  Verdigogh - have always liked it but have always struggled with it so haven't used it much.  Combining them really taxing!  Lots of discarded tiles littering my desk and this one needs a bit of cleanup - decided to post it because it's the best verdigogh I have ever drawn.  That's the good news and the joy to be found in this challenge - finally learned verdigogh!!!!  Nice to have another tangle to use with confidence.  Thank you, Laura - would not have happened without you.

Friday, June 17, 2011

Diva's Challenge 26


Spiral Out - Keep Going


 click images for larger view


 The Diva's challenge this week - use a spiral as the string.  Right from the start I wanted to use paradox in some form.  Can there be a more "spiral" process than the constant tile turning with paradox -  but it just wasn't happening. When I was finally able to let go and just watch to see what would show up, the first tile appeared - not a hint of paradox to be found!  I didn't post it right away as it felt like it needed something in the background - wasn't sure what - just didn't feel complete.

Tonight while prepping for tomorrow's class I was creating several strings to share as examples.   I wasn't looking to tangle any of them. One of the two-pencil strings just happened to be the spiral above.  I'd found my string for paradox without even trying.  Or maybe it found me!


Saturday, June 11, 2011

Diva Challenge 25

Zendala Magic
click image for larger view

Something different for the challenge this week. Guest host Genevieve Crabe, at TangleHarmony and a fellow CZT from Class 4, (Hi Genevieve) provided a template for creating a Zendala - nice fusion of Zentangle and Mandala. Lots of wonderful creations to check out on the Diva's site - or maybe it's time you joined in the fun. The new challenge for the week is posted on Monday.

The mosaic pattern in the inner ring is a technique/pattern I often woodburned on gourds. Lots of small cuts with the pen but it was almost a mediation while doing it. So simple but always a big hit at the shows - never took one back home at the end of the day.

Mosaic Gourd

click image for larger view

Sunday, June 5, 2011

Diva Challenge 24

String Theory - Stripes

click image for larger view

Nice to be back in the challenge game this week - rather it's a good thing to be back in the blog posting game.  I've done the challenges - have not made the time to get them posted.  Off to take a look and see the other entries.

Saturday, May 21, 2011

Diva's Challenge Week 22

A Little Help from My Friends


click images for larger view

The Diva's challenge this week - have someone else draw the string.  On Monday when the Challenge was announced I taught a small private class - 3 students - that afternoon.  At the end of a very fun class I gave them each a tile and asked them to draw a string.  They did a great job as you can see above.  Below are the results.  Thanks Anne, Theresa and Laura for a great class and fun strings.


Thursday, May 19, 2011

Zentangle 6 x 6


click image for larger view

I really like the zentangle tile paper - Fabriano Tiepolo - it's not readily available but I've managed to acquire a few sheets in order to work on some larger pieces.  This is the first - still a bit small at 6" x 6" but larger ones are in the works.

Saturday, May 7, 2011

Diva's Challenge Week 20

Royal Wedding

click image for larger view

Have been absent from the challenge for a few weeks and so wanted to get started again.  I'm not sure  how this work relates to the topic of the challenge - Royal Wedding.  I didn't follow it closely other than to see bits and pieces on the news so not sure where I drew my inspiration.  Looked at a few photos but . . .  In the end decided to just channel it and see what would appear.  My first and last take - lots of subtexts and mystery.   I think I do better work the less thought I put into them - would rather  just enjoy it for what it is - another Zentangle!

Wednesday, March 30, 2011

Diva's Challenge Week 15


Love Your Curves, Baby!
click to enlarge image

This week the 15th challenge from the Diva is the opposite of last week's straight line challenge.  This one is all about the curves.  Straight lines tend to dominate my zentangles but I do enjoy a well placed curve.  Doing all curves, of course, was a bit of a challenge but a fun one.  Even though it appears to have a deep sea theme, it was not planned or intended.

This one truly emerged One Stroke at a Time!  I like it - hope you will too.

Thursday, March 24, 2011

Diva's Challenge - Week 14

The challenge this week - create your zentangle using straight lines only -  definitely my kind of challenge.  I've always been drawn to the straight line tangles, they seem to dominate my work.  I do like the curves but I find I use them more as seasoning rather than the main dish.  Had to laugh at my first few attempts - little circles and a wave or curve to a line kept creeping in.  This challenge was so much fun I created several - posting 2 here to get started.  Thanks Diva!

I Walk the Line

 click image for larger view


 click image for larger view

Saturday, March 19, 2011

Diva's Challenge 13

Drawn with non-dominant hand - right!
click image for larger view

The challenge this week - create your zentangle with your non-dominant hand.  Yikes - this was not going to be easy.  Being left-handed in a right-handed world I've learned to do many things right-handed, but most of those are large muscle activities - like playing baseball - if you only have gloves for your left hand you learn to throw right handed!  Likewise with golf - it's hard to hit left-handed with right-handed clubs.  Then again they had left-handed foils and bowling balls drilled for lefties so I fenced and bowled left-handed.

However fine motor skills - they are all done left handed.   The few attempts I've ever made to write with my right hand - illegible - always.

To ease my way into this challenge - I started out just holding the pen and making marks on a piece of paper - needed to find out what my right hand wanted to do - how would it function - what would work and what wouldn't.   What I discovered - it felt better to grip the pen in a different way than I would left-handed.  Instead of holding the pen so that it rested between my thumb and index finger - it worked better to have the barrel of the pen resting between my index and middle finger.  Having both of those fingers on the top gripping the pen with my thumb supporting it from below seemed to provide a bit more control - it didn't feel like the pen was going fall out of my hand.  This grip felt more relaxed than when I tried to hold it the way I would grip it left-handed.

While my lines definitely had a shake to them I made another very odd discovery.  My normal stroke especially when drawing straight lines, is to draw the pen towards me.  Pulling it rather than pushing it.

Amazingly exactly the opposite was true with the pen in my right hand.  I started out pulling - result - messy uneven lines.  I had the most trouble with the start and end of strokes - blobs and shakes galore, but once I got moving, if I went very very slow the line was better.  Still uncomfortable.

Not sure what made me try it the other way - pushing away  - immediately I could tell the difference.  Out came a piece of scrap paper to test this out.  Sure enough if I pushed the pen away from me I had a better start, the line was straighter - I could hit my end mark most of the time.  Back to the tangle, it worked.  As I got closer to finishing it  I could see the shakes coming in again - by this time I think my hand was just getting fatigued from the workout I'd been giving it.

For this challenge it seems that it was necessary to do a lot of things in the opposite way not just hold the pen in the other hand.  Channeling  Arte Johnson here  - Interesting,  Verrrry Interesting!


Tuesday, March 15, 2011

Zentangle Basics Class

Doesn't this look like a fun group!!
Wonder why they're smiling?


They  just completed a Zentangle Basics class held at the Shepherdess  in San Diego

Thank you all it was a pleasure to share the art of Zentangle with you.  The tiles you created are all beautiful works of art.  Another thank you to Candy for taking the photos and sharing them with us.
 The beauty and wonder of Zentangle can be seen in the mosaics of the two tiles that were created in the class.  While all received the same instruction and used the same tangles you can see the unique art created by each student.  Enjoy!

Class Tile 1

click image for larger view

Class Tile 2

click image for larger view

Saturday, March 12, 2011

Diva's Challenge Week 12

Blue Rebellion


click image for larger view

I had a lot of resistance to completing this challenge - ended up waiting to the last minute to attempt it. I really did not want to use color - the part of me that needed to rebel completed the tile above. Once I had the that bit of rebellion out of my system I completed the second tile using blue paper.

The center is a combination of Hibred and Rick's Paradox, the outside edges were just created as I went along. Reminds me a bit of wire work. Will have to play with that one a bit more. The shading really changed it, unfortunately the photo does not do it justice.

Blue Paper

click image for larger view


Sunday, March 6, 2011

Diva's Challenge 11


Beeline

 
click image for larger view

The Diva's challenge this week was Monotangle - get creative using just one tangle.  I chose Beeline I really enjoy using this tangle - so many possibilities.

Friday, February 11, 2011

Diva's Challenge Week 8

Zentangle Heart

click image for larger view 


The Week 8 challenge from  CZT Laura Harms - Create a Heart, using two of the previous challenge themes and send along some healing intent for her baby son Artoo.

Challenges of simplicity and orbs to send along healing energy to the hearts of Laura and Artoo.